Tuesday, July 7, 2015

How to create a gallery wall: the one simple tip that makes any gallery gorgeous!


Nowadays you can’t scroll through pinterest without seeing someone’s gorgeously styled gallery wall. As a result, when I moved into my apartment last year I started assembling my gallery wall on pretty much day one. It started with three prints, but I bought 5 frames to kick start the gallery wall (I have a bad habit of buying and hanging frames before I have anything to put in them. Don’t tell anyone, but they often hang empty for months. Oops!!).

Before a hung, I put a lot of time into scouring the internet to get an idea of how I wanted to lay out my gallery wall. After much searching and plenty of agonizing, I can across this tip on the Pottery Barn website that was a total game changer for me. Suddenly, no matter which arrangement I tested with my frames, the display looked gorgeous and totally put together.


Basically, the tip is that you want to keep a “spine” running down the center of your display. The frames should vary in their height/width from the central spine, and be arranged both horizontally and vertically, but at the center the frames should be a straight line running down the center, and the frames should be of equal spacing from one another.


This tip even works on smaller "galleries, as you can see with this arrangement of three frames over my dresser. The "spine" is to the left of the larger photo, and the two smaller frames are oriented off of that.

This way of organizing the display is also really nice because it will allow the display to grow over time in a logical manner. You don’t end up with random spaces that are hard to fill!


My final piece of advice on assembling a gallery wall, and art in your home in general, is to be patient and collect your pieces over time. I enjoy the art in my home so much more when it’s connected to a meaningful memory (an afternoon with the beaux at an outdoor craft market, finding a charming artist’s studio on a back street in Europe, ect.) than when I simply bought it at a store. Don’t get me wrong, decorative art pieces from big box stores like Pier 1 and Homegoods definitely have their place in my home, but I do enjoy my art more when it is collected from my travels or when it is a picture that I took myself.

How about you? Have you hopped on the gallery wall bandwagon to decorate your own space? Let me know if you have any tips and tricks of your own in the comments below!

xoxo - Katie
Friday, March 6, 2015

My Pinterest Diet: How I Use Pinterest To Meal Plan

Hello again!

Now that we’re already into March, how is everyone doing with their New Year’s resolutions? I’m guessing my new year’s resolution of eating a healthier, more varied diet (and by varied I mean not eating fro-yo every day ;) was a popular one this year, even though it’s not the easiest one to keep.

So far I’m making good on my resolution to eat better, cook more and get healthy, but one thing I’ve learned is you have to re-resolve to your resolutions every day! I’ve had plenty of cheat days since the new year, and the hardest thing for me has always been getting back on the plan the day after. The single factor that’s made the biggest difference for me being able to stick with the plan (even after mess-ups) this year is…drumroll…weekly meal planning.

I remember hearing this tip before and not giving it a second though. I thought it was for moms, or people on super tight budgets, or fitness nuts. I thought it sounded like too much work. But planning and making meals has become my new favorite hobby thanks to one indispensable tool, PINTEREST!

Thank the internet gods for Pinterest (am i right?). Read on to see my method for making meal planning so easy and fun!


Step 1: Create your boards. Previously, I had one board titled “Healthy Food” where i dumped every single interesting recipe i came across. No Bueno my friends. I remember scrolling up and down this page when I wanted to find a recipe waiting until something jumped out at me, and something something never did. No update, I separated my recipe pins onto multiple boards as follows:

-Chicken
-Beef
-Seafood
-Vegetarian (Meatless Mondays)
-Side Dishes
-Breakfast
-Lunch Ideas

Why does this work for me? When I go to meal plan, I usually start with the chicken page. Quickly one or two recipes I’ve pinned will catch my eye and I will pull those out for the week. Then, i know I need to vary my proteins so I will hop over to my beef and seafood boards and pick out a few recipes from there. If i’m bored with my usual yogurt for breakfast, it’s easy to find a breakfast recipe on my breakfast board. No scrolling up and down a single board cluttered with everything under the sun trying to find that one recipe that will work.


Step 2: Create your shopping list. I do this paperlessly by having two windows open on my computer. My pinterest on the left and a word document on the right. As I’m surfing through my various boards I will click through to the recipes that appeal to me that week and record the name of the recipe, the link to the recipe, and all of the ingredients i need to create the recipe on my word document. Once you get your pinterest boards filled out with a good volume of recipes to choose from, this process can take as few as 5 minutes!


Step 3: Cook and Review! My single favorite thing about this process (besides the fact that I can feel like I’m doing something productive while surfing the internet looking at pictures of delicious food) is filling out my “Recipe Reviews” board. Every time I cook a new recipe, I re-pin it to my recipe reviews board along with my thoughts about the recipe, any modifications I made, anything I’d do differently next time, ect. Pinning new recipes to this board gives me such a sense of satisfaction; I love watching the number of pins on this board grow along with my skills in the kitchen!


And that’s it! I go shopping for my groceries once a week on Sundays. Once a week shopping helps me stick to my plan even if I have a screw up in the middle of the week; once I already have the ingredients in the refrigerator and recipe ready to go it’s much harder to go out to say “f*ck it, I’m going out for sushi” (I know you feel me).

I hope this post has inspired you to keep on keeping on with any resolutions you might have made for 2015!

xoxo - Katie
Tuesday, January 6, 2015

Decor In Review: Christmas 2014

Hello again internet!

It has been a gooood long while since I've worked on this blog. To make a very long, winding story short, 2014 was a roller coaster ride that consisted of a new job, quitting said new job, moving to a new city, going back to school, and finally being accepted into my dream occupational therapy masters program! Hooray!

While the holidays are over, I wanted to document the decor I found to make my tiny little Philadelphia apartment festive for the season. First up, the tree!


 After a few nightmare experiences with live trees in small apartments, this year I finally settled on a pre-lit fake tree from target. I scored it just before Thanksgiving on a 50% off deal (a good tip if you are in the market next year, keep your eyes open for sales before thanksgiving!) and this baby was only $30! I consider myself a Christmas tree snob, so saying that I love this tree really holds some weight.


For ornaments this year I went with a monochromatic muted gold and silver color scheme. I found almost all of them at HomeGoods, with the exception of my basic balls and elongated santas (seen in top right corner) which came from Target.


I scored this statement tree topped from Pier 1. I LOVE this thing. It was also a steal at around $15 full price, but they always have great sales leading up to Christmas!


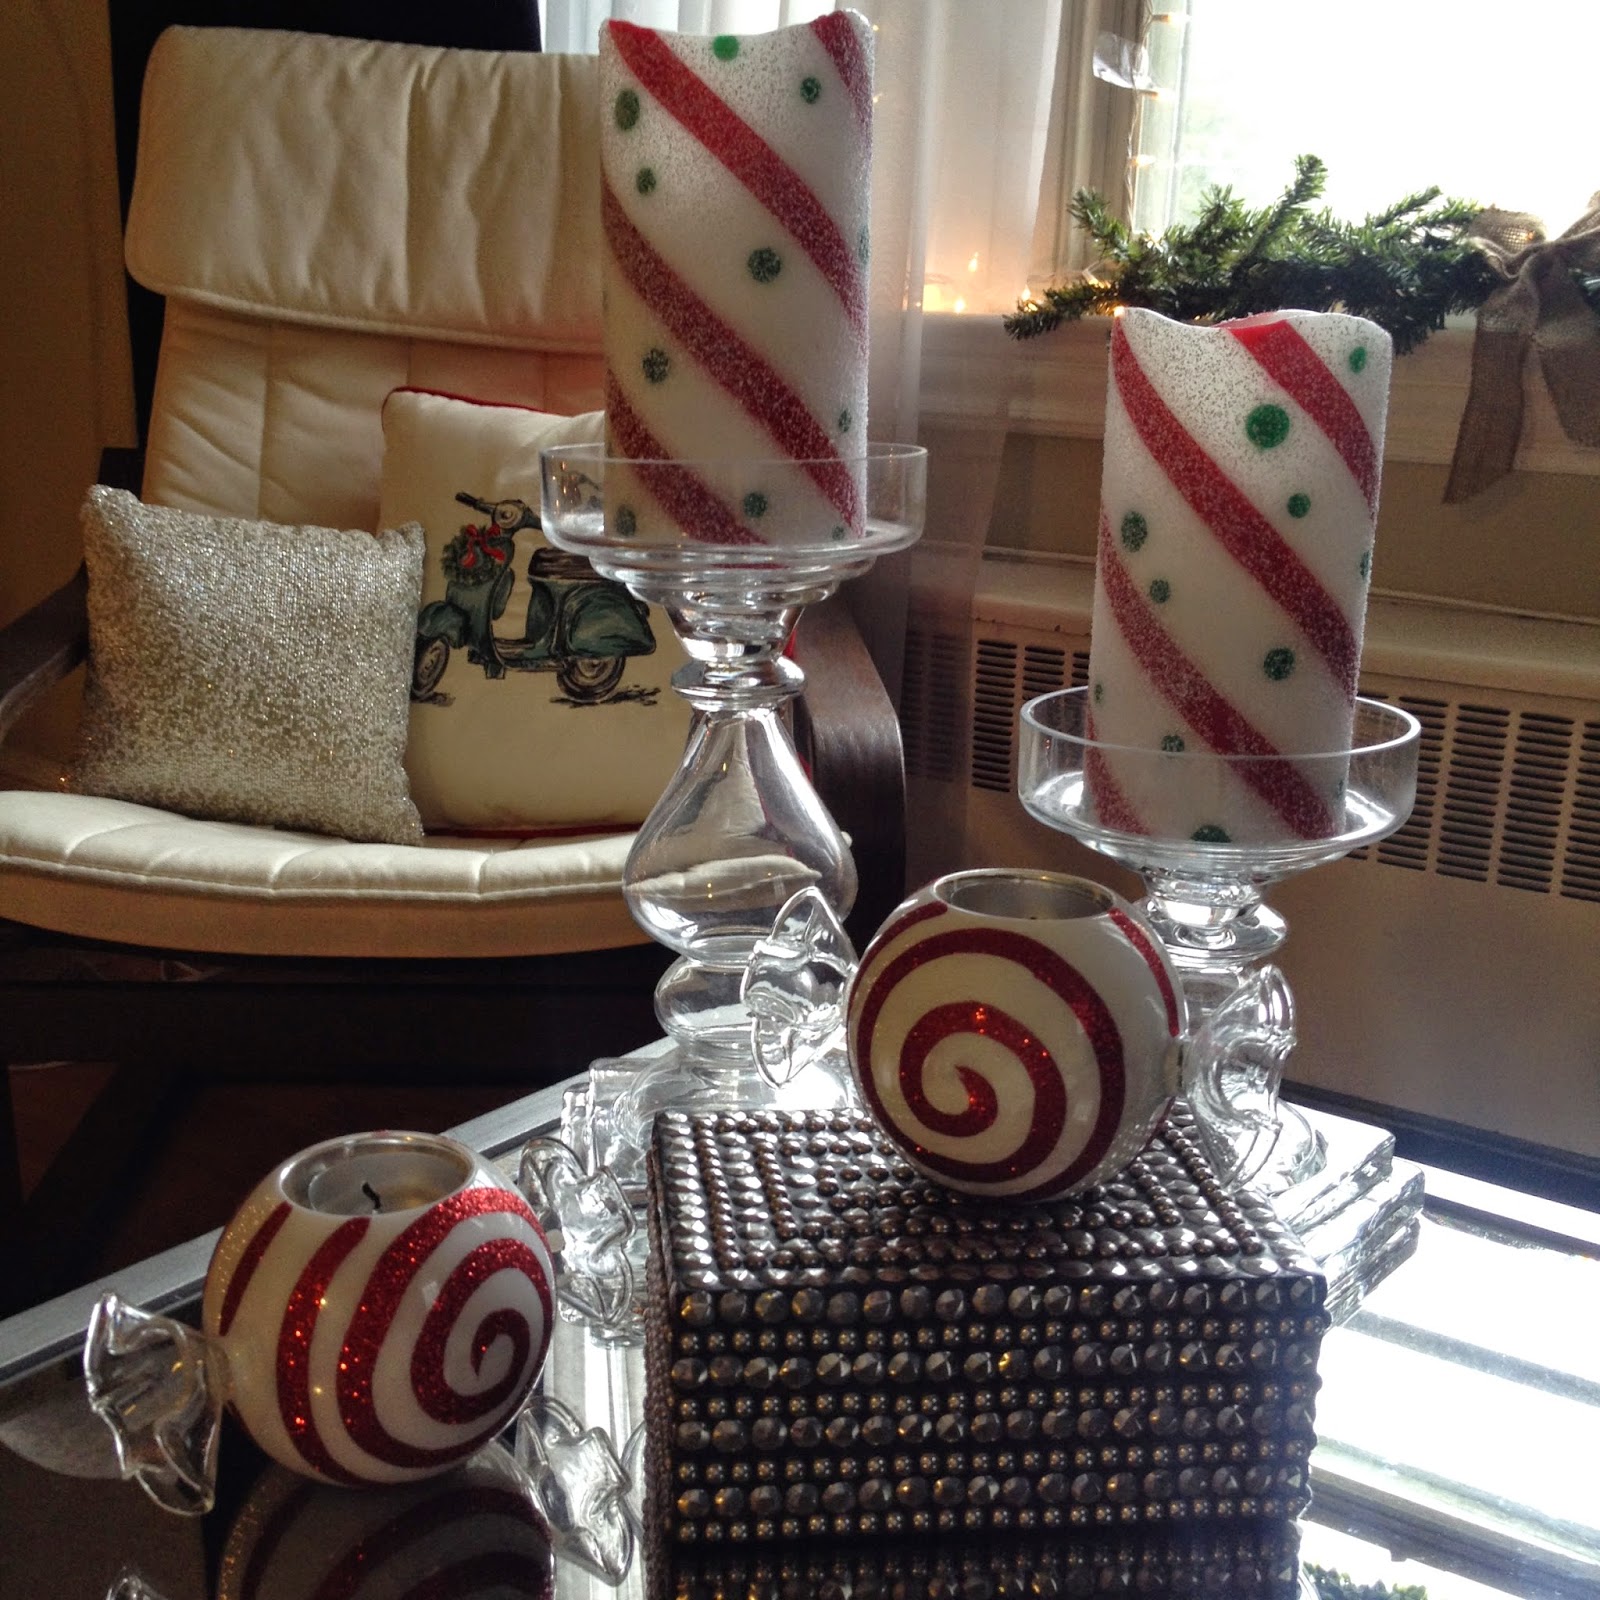
This little coffee table display is one of my favorite vignettes from the holidays. The pillar candles and candy tea light holders are from Pier 1, and the box and glass pillar holders are from Pottery Barn. I loved lighting up the candles in this display at night!

The pillows in the background were from Target. I loved their urban vibe, and I'm thinking the smaller beaded pillow will be good year round!


Over on the other side of the coffee table, I have to share with you these gorgeous homemade coasters I picked up at a local arts festival. Each coaster in the set is slightly unique and they are the best quality! Go check out the artists Etsy shop here!


One of my favorite holiday decorations that might stay up through the winter were the fairy lights I lined my three front windows with. I actually picked this idea up from the Mindy Project (Mindy does this in her supercool NYC apartment). I also hung a wreath from the middle window with a bit of chevron ribbon (not quite visible in this pic) and created a little greenery for the sill with a length of garland and a burlap ribbon from the Target dollar section.


Another little vignette I made up this season could be found under the tree. I loved these lanterns and this silver sparkly nutcracker that matched my ornaments on the tree!


On a corner of my kitchen countertop you could find this bath and body works owl luminary (recycled from my fall decorations) paired with a couple vintage mason jars (one held straws and the tall jar usually held wooden spoons. The spoons all happened to be dirty when I took these pics!) and a small wooden sign from Pier 1.


Finally, I was inspired to put this little display from a user on instagram (I wish I remembered her username!!). I stuck some Martha Stewart bottlebrush animal ornaments in HomeGoods apothecary jars with some kosher salt for snow. The display was all arranged on a mirrored tray from Target and accented with some fairy lights. So delightful!

I hope you all had as wonderful of a holiday season as I did! Wishing you health and happiness this 2015!

xoxo, Katie