Sunday, March 3, 2019

Soft and Chewey Chocolate Chip Cookies


I am in LOVE with these Chocolate Chip Cookies! This is kind of a big deal, because in general, I really don't love chocolate chip cookies. Especially the Tollhouse recipe that's on the bag. So not my thing! These, though, are a breed of their own. Soft, chewey, and very light in taste. I love these, and I know you will too!


Ingredients

  • 3 cups all purpose flour
  • 1 tsp baking soda
  • 1 tsp sea salt
  • 1/2 tsp baking powder
  • 1 cup softened salted butter
  • 1 cup granulated sugar
  • 1 cup packed light brown sugar
  • 2 large eggs
  • 2 tsp vanilla extract
  • 12oz bag milk chocolate chips (godiva) 


Directions

Preheat oven to 375 degrees. Line a baking pan with parchment paper. Set aside.

Cream together softened butter and both sugars for about 3 minutes in an electric stand mixer. Add in both eggs and vanilla and beat for a further 2-3 minutes until fluffy.

Whisk together all dry ingredients in a separate bowl (flour, baking soda, sea salt and baking powder). Add the dry ingredients to the butter, sugar and egg mixture. Mix at low speed until well combined. Add in chocolate chips and mix.

Use a small cookie scoop to place cookies onto a baking sheet. Bake for 8 minutes. DO NOT OVERBAKE! After 8 minutes, take the cookies out of the oven and cool for 2 minutes on the cookie sheets before transferring to a cooling rack.

These cookies are delicious warm and cool! Enjoy!
Sunday, February 17, 2019

Nana's Sweet Beef Chili


Chili is one of my top 3 favorite foods (right up there with pizza and ice cream), and I can promise you, if you are a chili connoisseur like me, there is no chili in the world that can compare to my Nana's chili. You can adjust this beef chili recipe to make it more or less sweet, but after trying my hand at many, many chili recipes over the years, I've decided the secret ingredient that makes this chili so unbelievable is the addition of white vinegar. The vinegar and the sugar combine with the spices in this chili to make a flavor profile that is just...divine. Give my Nana's chili recipe a try. I guarantee you, you will love it!


Ingredients

  • 2 1/2 lbs ground beef
  • 2 cloves garlic
  • 1/2 cup chopped onion
  • 1/2cup chopped green pepper
  • 1/2 cup chopped celery
  • 28oz can whole tomatoes (Red Pack)
  • 28oz can tomato sauce
  • 40.5oz light red kidney beans (1 large can, Hanover)
  • 1 1/2 tsp salt
  • 2 tsp paprika
  • 2 tsp chili powder
  • 1 tsp dry mustard
  • 1/2 tsp cloves
  • 1/2 tsp ginger
  • 1/2 tsp allspice
  • 1/2 tsp cinnamon
  • 1/8 tsp cayenne pepper
  • 1 tablespoon vinegar, plus more to taste
  • 1/4 cup brown sugar, plus more to taste
  • more chili powder to taste

Directions

Saute the ground beef along with the garlic, onion, pepper and celery until the beef is cooked through and brown. Drain.

Add the whole tomatoes, tomato sauce, kidney beans and spices. Bring to boil then cook over low heat for at least 30 minutes. Allow to cook slowly for several hours for best results. Enjoy!
Thursday, February 14, 2019

World's Best Double Chocolate Brownies


Happy Valentine's Day everyone!


Today, in honor of a day typically celebrated with a dose of sweet treats, I'm sharing my double chocolate brownie recipe! These are the brownies from my childhood and are just so delicious. My husband loves these warm, but I actually prefer their perfectly dense, slightly crunchy texture when cool. Serve these alongside some vanilla ice cream and you will have a sweet day for sure!


Ingredients

  • 4 ounces BAKER's Unsweetened Chocolate
  • 1 cup (2 sticks) salted butter
  • 2 cups sugar
  • 4 eggs
  • 1 1/2 cup all-purpose flour
  • 1 cup chopped nuts (optional)
  • 1 cup chocolate chips (options)

Directions

Heat the oven to 350 degrees.

Melt the chocolate and the butter in a heavy saucepan on low heat, stirring constantly. When chocolate is completely melted and free of lumps, stir in sugar until well blended.

Mix in eggs, one at a time, and add vanilla. Stir in the flour. Add nuts or chocolate chips as desired.

Spread the batter into a greated 9x13 inch baking pan, preferably glass.

Bake 30 to 35 minutes or until a toothpick inserted into the center come out with fudgy crumbs. DO NOT OVERBAKE. cool in pan, then cut into squares. Sift on powdered sugar if desired.

Recipe makes 16 large or 24 small brownies. Enjoy!


Monday, January 21, 2019

Valentines Day Decor 2019


Hello all!

Happy almost February! I’ve never decorated for Valentine’s Day before, but decided this would be the year! I’m really not into heart decor, so I instead went for subtle pink accents, mercury glass, and plenty of romantic candlelight! Read on for some inspiration for how to include subtle and classy Valentines Day decor into your home!


In our living room, I accented the space with pale pink faux hydrangeas (these from pottery barn are my favorite, so realistic and they last forever!) and mercury glass candleholders to give a glitzy and romantic glow. I gave my gold marble initial coasters pride of place on my coffee table this season to remind me of my hubby!


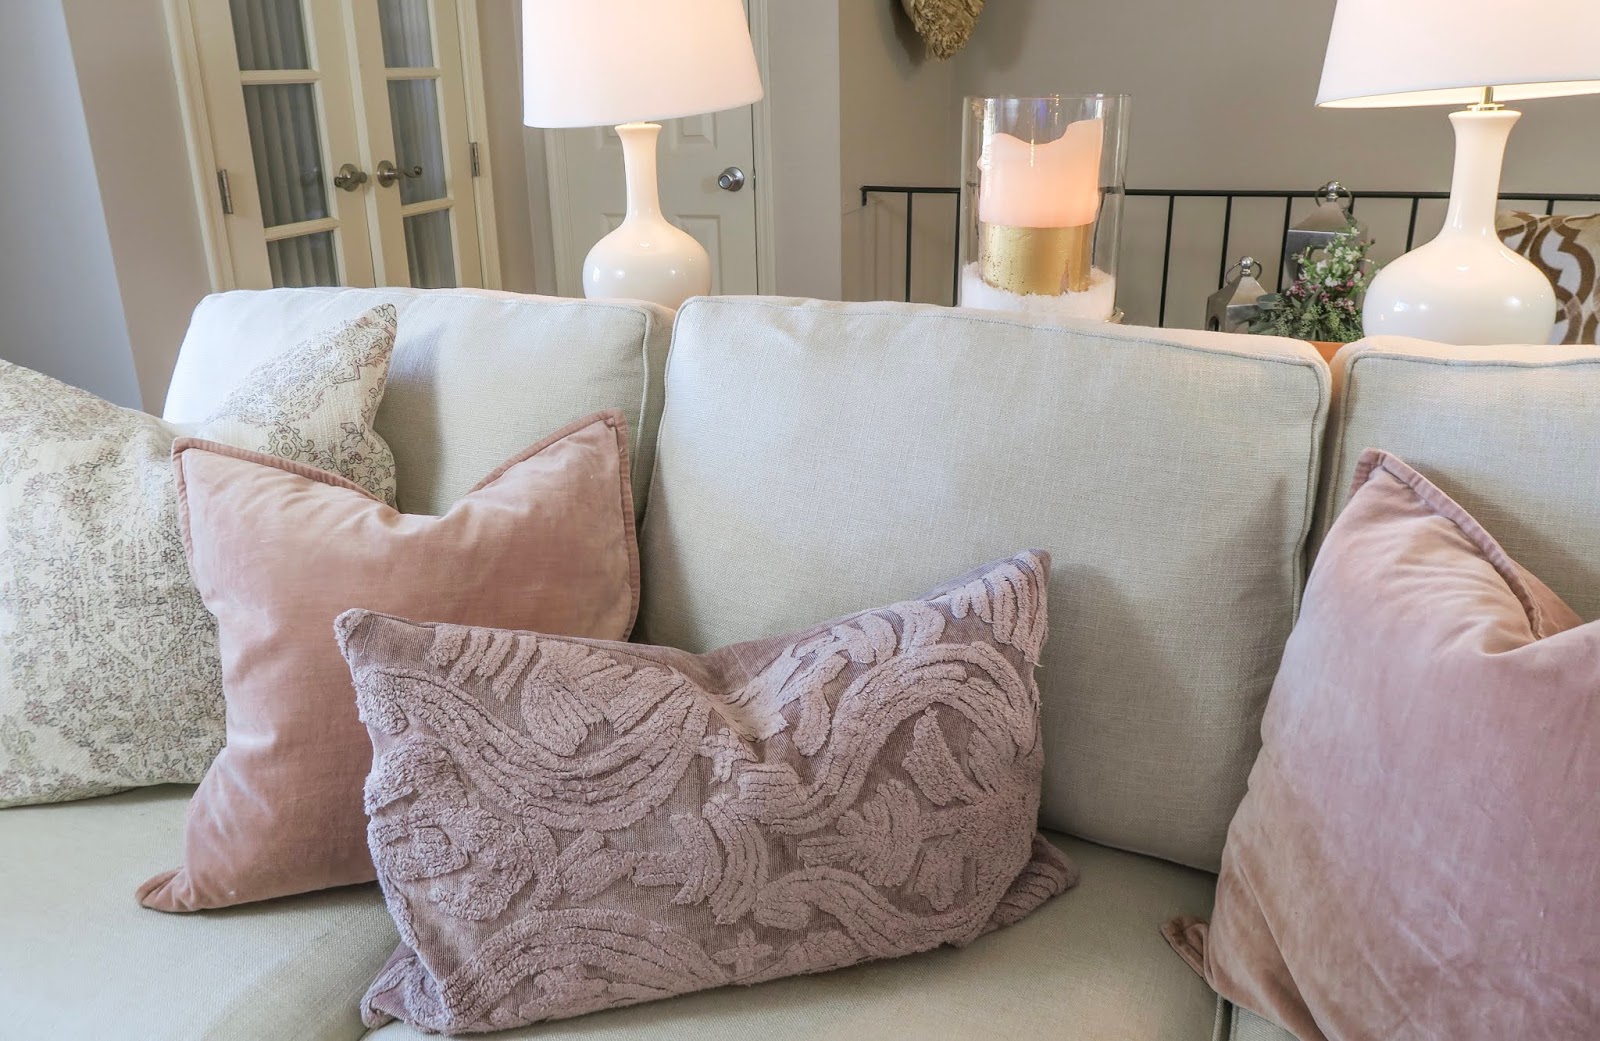
Pink was the name of the game for my throw pillows this season! I love the dusty pinks and mauves in each of these pillows. To me it reads much more mature than the traditional hot pink Valentine’s Day decor that’s such a staple this season.


I accented my winter bench display with this subtle pink and purple flower arrangement. I found this vase at target. It’s covered in an all over lace pattern (sort of like a lace doily) which I found so perfect for Valentine’s Day! 


In keeping with the lighthearted irreverent theme of Valentine’s Day decor, I had to pick up this Pom Pom basket! I love it in this space in our bedroom, stuffed full of pillows in pinks and blues for the season. Too fun!

Well there you have it! It was so fun to find subtle ways to include Valentine’s Day colors and ambiance into my home. 

With love, Katie


Thursday, January 10, 2019

20 Photos That Will Inspire You To Visit Brittany, France


Hello all!

We visited Brittany as part of our honeymoon road trip around France. The region's beauty is undeniable, and the culture is lovely. We were not the only English speakers there, though we were the only Americans we met! Brittany is a popular spot for British tourists, and I can see why.

In this photo lineup you'll find photos of the famed Mont St. Michel, the stunningly rustic and off the beaten path Pointe du Grouin where you can see a tiny Mont St. Michel in the distance on a clear day, St. Malo, the bustling and beautiful beach resort town where we stayed, and Dinan, an incredibly charming medieval city complete with ramparts and half-timbered houses.

You'll also spot some photos of the local cuisine; Brittany is the birthplace of Crepes! We ate so many crepes and boules of cider (crepe's traditional accompaniment) on this trip. Creperies are so perfect for an inexpensive but utterly delicious traditional meal.

I hope these photos inspire you to add Brittany to your bucket list!


Mont St. Michel

 Buildings on Mont St. Michel

 Buildings on Mont St. Michel

 View from Mont St. Michel
The menu at a French restaurant in St. Malo


St. Malo

St. Malo

St. Malo

The view from the ramparts at St. Malo

 St. Malo

St. Malo


Pointe du Grouin

Dinan

Dinan

View from the ramparts in Dinan

Dinan

Dinan

Dinan

Dinan

 Dinan

 Dinan

Kouign-amann


Saturday, January 5, 2019

How To Decorate For Winter After Christmas: Winter Living Room


Hello all!

This year, instead of stripping all my seasonal decorations away as soon as Christmas was over, my husband and I decided it would be much more hygge (cozy!) to decorate for winter. Winter JUST started on December 21st after all! Where we live, we have plenty of dark, gloomy months ahead. As we are practicing the Danish art of hygge this year, or feeling cozyness through the winter, it didn't feel right to strip all of the warm elements out of the house and head straight for spring.

We're loving the warm cozyness of our winter decorations and have spent our working days recently looking forward to coming home to hygge (cozy up). If you're interested in learning how to transition from Christmas decorations to winter decor, read on!


1.) Take all Christmas colors and motifs out.

Step one for transitioning from Christmas to winter decor is to go through your house and remove all traces of red, all Santas, all ornaments, anything that specifically screams Christmas. Red is such a classic Christmas color and without removing it, onlookers are likely to see more of Christmas than winter when they look at your decor. Similarly, ornaments and Santa figurines aren't associated much with Winter, but are very associated with Christmas. Take these out of your house as well.


2.) Focus on neutral, textural decor.

Whites and silvers work really well for Winter decorations. It's a good idea to also leave a good mix of materials in your decor to create warmth when things are very neutral in color. Mix woods with wickers with wools with canvas to create a layered, textural space that still feels warm despite a wintry white color palette.


3.) Repurpose Greenery.

While trees filled with ornaments and glittery garland running down a staircase screams Christmas, smaller, ornament-less trees and classic unadorned green garlands can transition really nicely to winter decor. We chose to leave two small lit trees in our house through winter this year as hygge-inspiring winter, rather than Christmas, trees.


4.) Candles, Candles Everywhere!

To up the cozy factor of your winter decor I can't recommend candles enough. Search for candle holders in a variety of textures (I have wood, mercury glass and iron hurricanes and candle holders that I love) to create centerpieces and decorative accessories that warm up a winter space.


So there you have it! I hope this gave your some inspiration if you're looking to transition into winter decor this year rather than skipping straight to Spring. I'm loving the cozy warmth of my winter decorations and I know this is a decorating season I will never skip again! The best part is we spent virtually nothing to transition from Christmas into winter decor, it's all about re-purposing! I had most of these decorations out at Christmas as well, but they look very fresh rearranged in my house.

Happy Decorating! With Love, Katie